 Nuclideon
 Map Tiles
The Map Tile feature allows you to render maps from a server to contextualize your geolocated scene onto the real world.

Adding a new map tile can be done by clicking the ![]() Add Map Tile button in the Tool Bar
Add Map Tile button in the Tool Bar
You will be prompted by a server selection window:
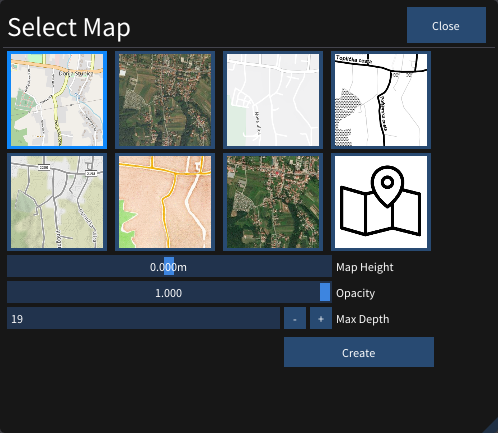
Choose from a pre-configured set of map servers. Checking the "Custom" option will show further options, allowing you to configure your own tile server URL.
- Map Height Offset vertically the map tile positions.
- Opacity Transparency of the map tiles.
- Map Depth The higher the map depth, the more detailed the map tiles will be.
Press the 'Create' button when you are happy with your selection.
After it has been added to the scene it will look like this in the Scene Explorer: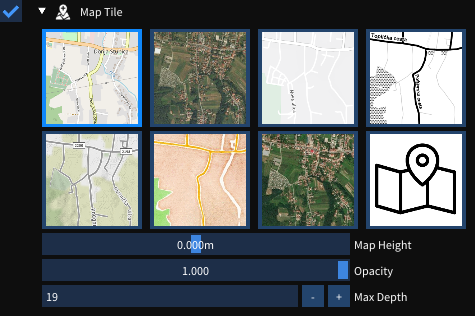
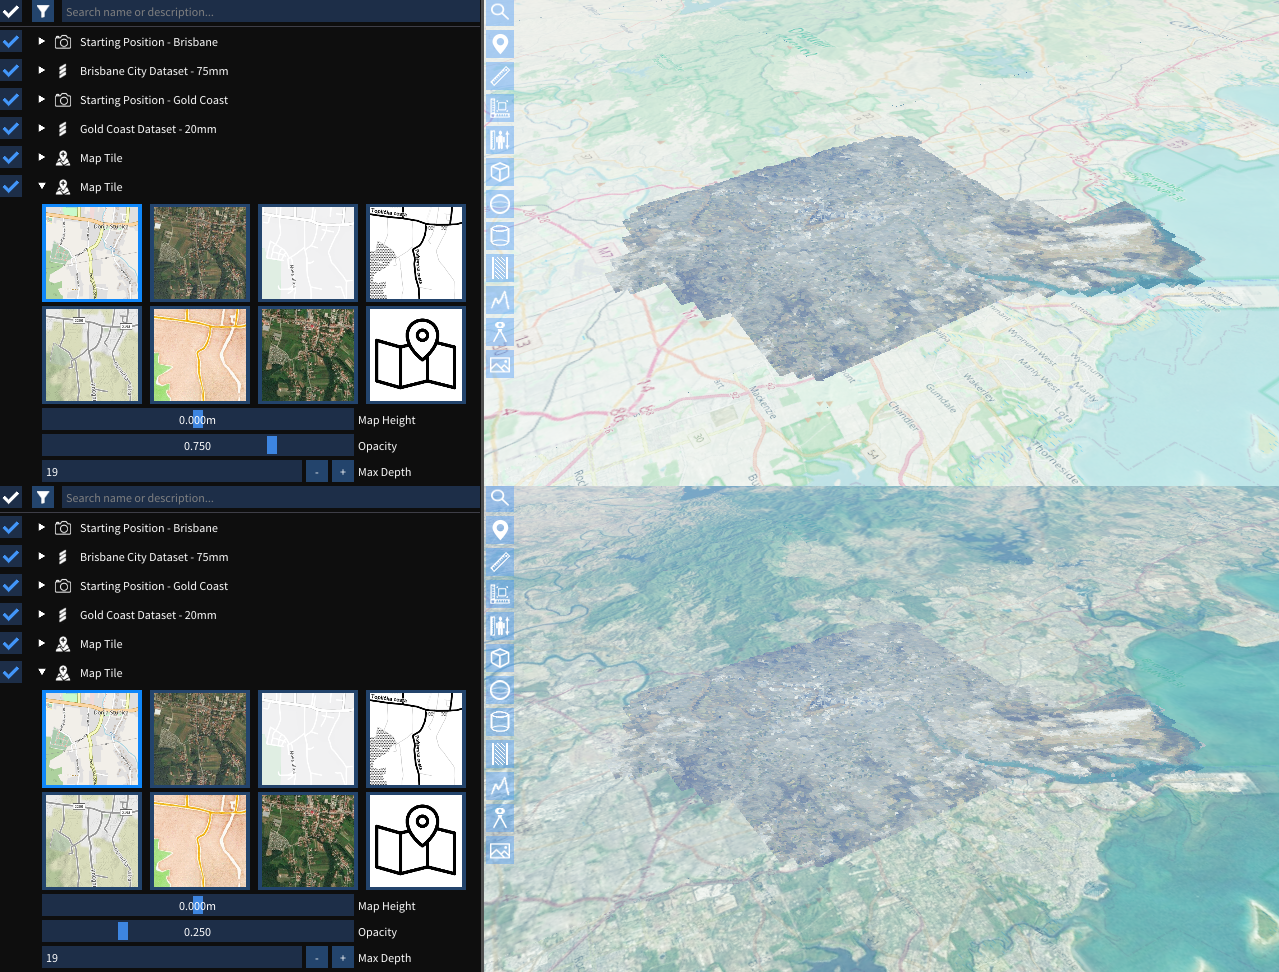
Overlapping Map Tiles
When you have multiple Map Tiles in the scene, Map tiles closer to the bottom of the Scene Explorer list overlap the previous map tiles. By changing the opacity of Map Tiles, you get an effect of Map Tiles combining.
Ribbon Settings
When a Map Tile item is selected, the ribbon tab shows:
- Map Server: The tile server type (pre-configured or custom).
- Custom Server URL: The URL template for a custom tile server (visible when Custom is selected).
- Map Height: Vertical offset for the map tile plane in metres.
- Opacity: Transparency of the tiles (0 = invisible, 1 = fully opaque).
- Map Depth: Level of detail for tiles; higher values load more detailed tiles.
Scene Node Metadata
| Key | Type | Description |
|---|---|---|
type | string | Map server type identifier. |
customServerURL | string | URL template for a custom tile server. |
customAttribution | string | Attribution text for the custom server. |
mapHeight | double | Vertical offset of the tile plane in metres. |
transparency | double | Tile transparency (0.0 = transparent, 1.0 = opaque). |
maxDepth | int | Maximum tile detail level (map depth). |